
How to measure multiple areas in a single measurement (Layers)Updated a year ago
In this chapter we’re going to show you how to use one of Moasure users’ favourite features: “Layers”.
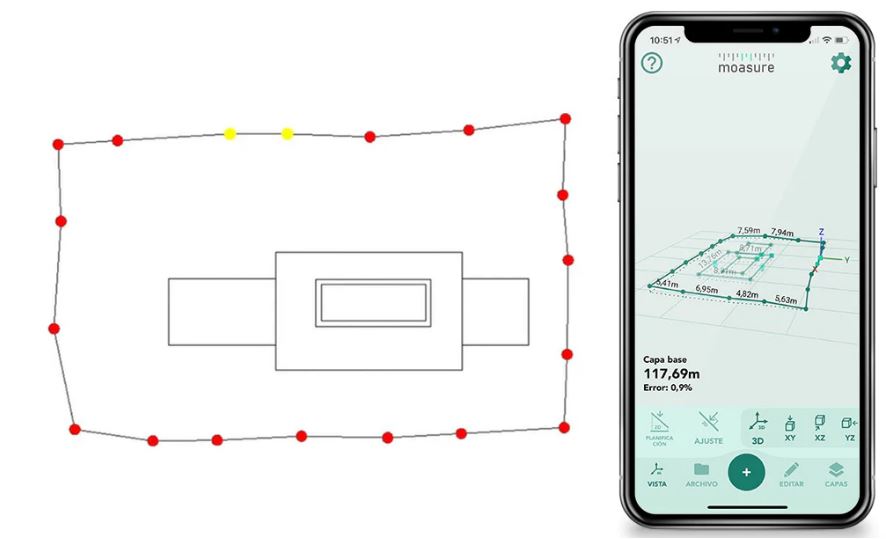
This new and powerful feature enables you to measure shapes within an area and produce a comprehensive on-screen diagram of all Layers – all positioned relative to each other.
Step-by-step instructions on how to create Layers
Tap on the “Start/Finish a New Measurement” button in the bottom centre of your screen;
Select “Closed Shape” from the list of available measurements options;
Select the pathtype you would like to use to start your measurement (remember that you can switch between other Path types throughout your measurement at any pause point);
Once you’re ready to finish your first measurement, tap on the “Start/Finish a New Measurement” button in the bottom centre of your screen;
To create a second Layer, tap on the “Layers” button in the left bottom corner of your screen and select “Add Layer”;
Important: the first two points you captured at the beginning of your measurement will be used as “Reference Points” for all Layers. This will ensure they overlay in the correct place.
Please make sure the two reference points are easy to access and locate, as every time you create a new “Layer” you will need to go back to the first two reference points.
Ideally, the two reference points must be separated by 4-5 metres.
When starting a new Layer, you’ll notice that the Pathtype is set to “Ignore Line”. This will prevent the orientation line from showing on your measurement diagram.
Once you’ve moved from the reference line to the first point of your next measurement and are ready to measure, please don’t forget to switch from “Ignore Line” to the pathtype you’d like to use next (Straight Line, Trace Line, Arc, Circle, etc).
Once you’re ready to finish your second measurement, tap on the “Start/Finish a New Measurement” button in the bottom centre of your screen.
To add new Layers, please refer to Point 5.
Check out this example to learn more.
Key Tips
All Layers must share the same first two reference points to ensure they overlay in the correct place.
When adding a new sub-layer, the Path between the orientation line and the first point of the sub-layer will be set to “Ignore Line”, meaning this line will not appear on your measurement diagram.
Once you've arrived at the sub-layer and when you're ready to begin measuring, change the Pathtype for the measurement.
You can switch between other Path types throughout your measurement at any pause point.
Remember, measurement error grows with time, not distance.
Pause every 6 – 8 seconds throughout every measurement.
Try to maintain a pace of at least 3ft (1m) per second – pause more regularly for longer measurements. Use each pause to plan your next move.
Use the "Ignore Points" tool within the app to "ignore" individual points captured during the measurement. Once a point is ignored, a line will be drawn between the points before and after the ignored point(s). Use this feature when you need to walk around an obstacle, or when you don't have line of sight through an obstacle.
View measurement feedback from Moasure Coach, to help you measure with confidence and accuracy.