How to view your measurements in 3DUpdated 3 months ago
In this chapter you’ll learn:
- How to view your measurements in 3D
- Projection modes available
Step-by-step instructions on how to view your measurement in 3D
By default, you will be in “Plan View” which will be a top down view of your measurement. All height values are ignored.
To view your measurement in 3D, please follow these steps:
Tap on “View” in the bottom left corner of your screen;
Tap on “3D View”;
Select the projection mode you would like to use to see your measurement.
Please note that you can zoom in and zoom out. Simply touch two fingers on the touch screen, and move them apart to zoom in, or together to zoom out.
2. Projection modes
There are multiple projection modes which we’ll explain in detail below:
Plan View
By default, you will be in “Plan View” which will be a top down view of your measurement. All height values are ignored.
Best Fit
This view tries to display the points based on the normal direction of the shared plane between them.

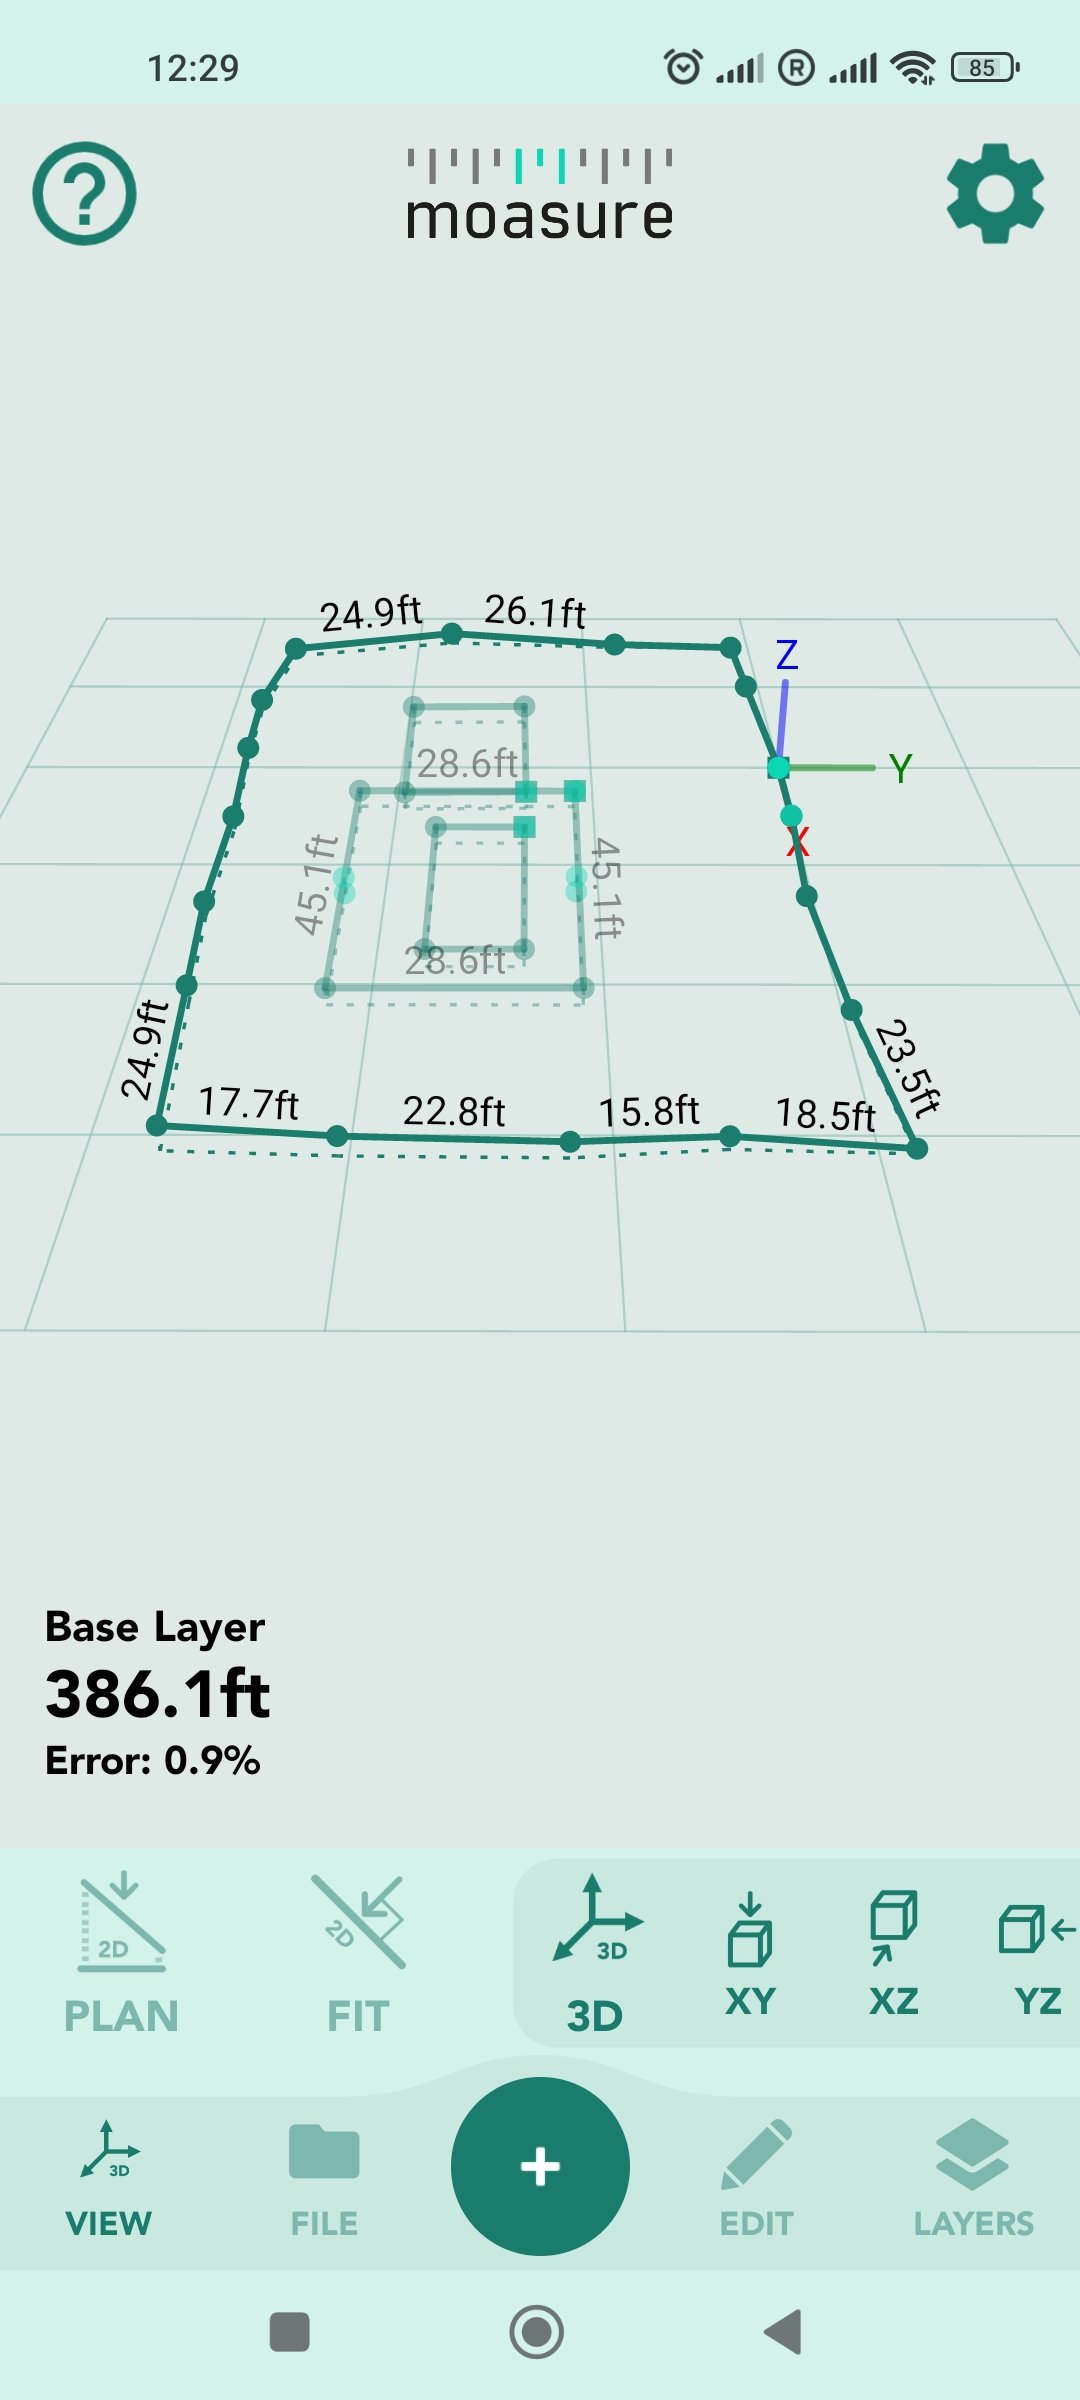
3D
This view allows you to rotate and view your measurement fully in 3D, displaying the height of each point.
The 3D View can be rotated into three standard orientations: XY, XZ and YZ.
Side View
This is only available in a “Point to Point” view and shows the side view of the measurement between the start and end points.
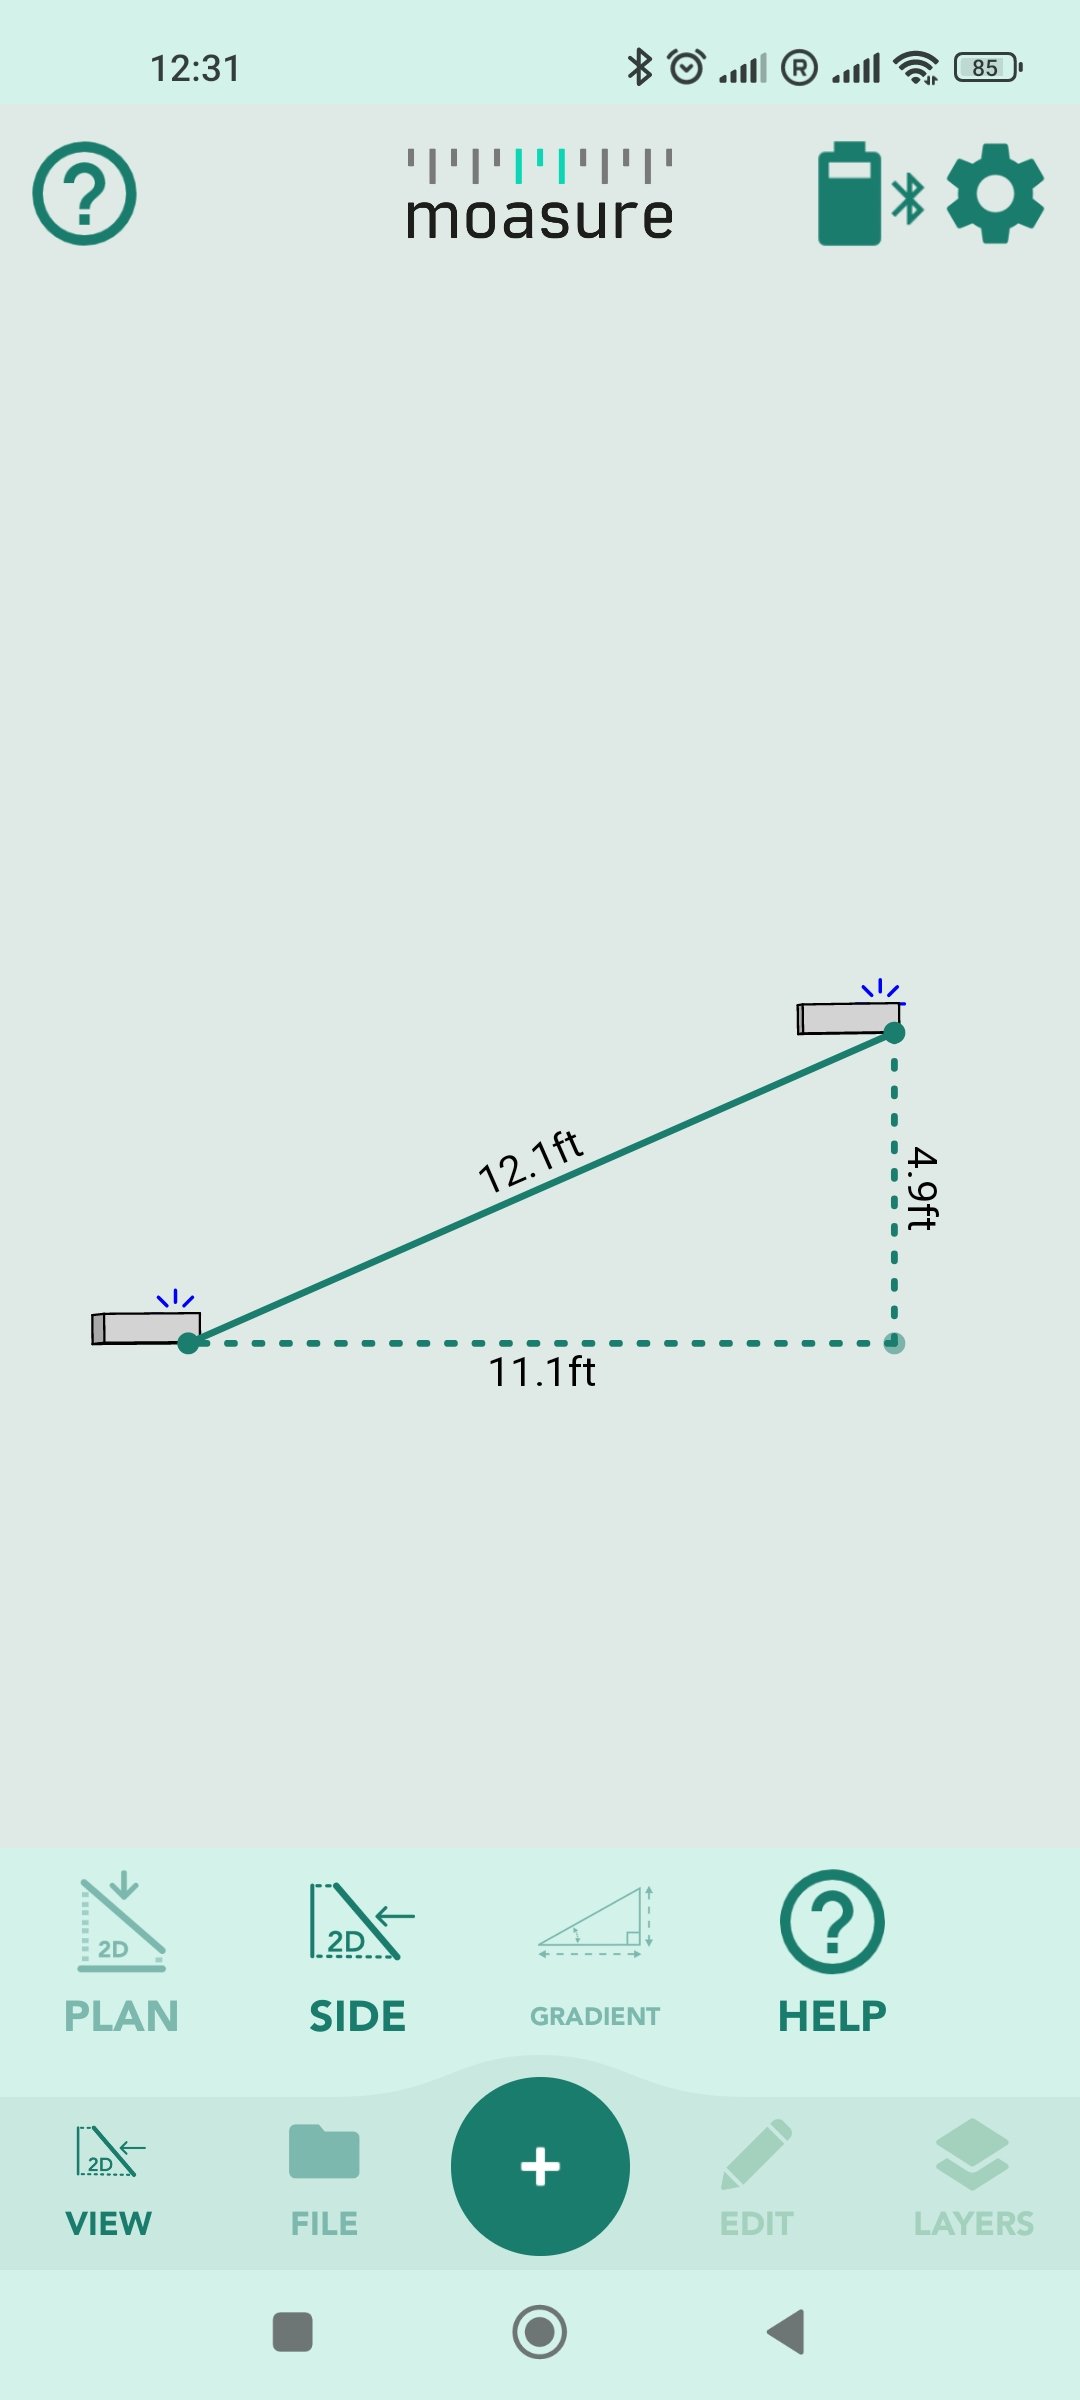
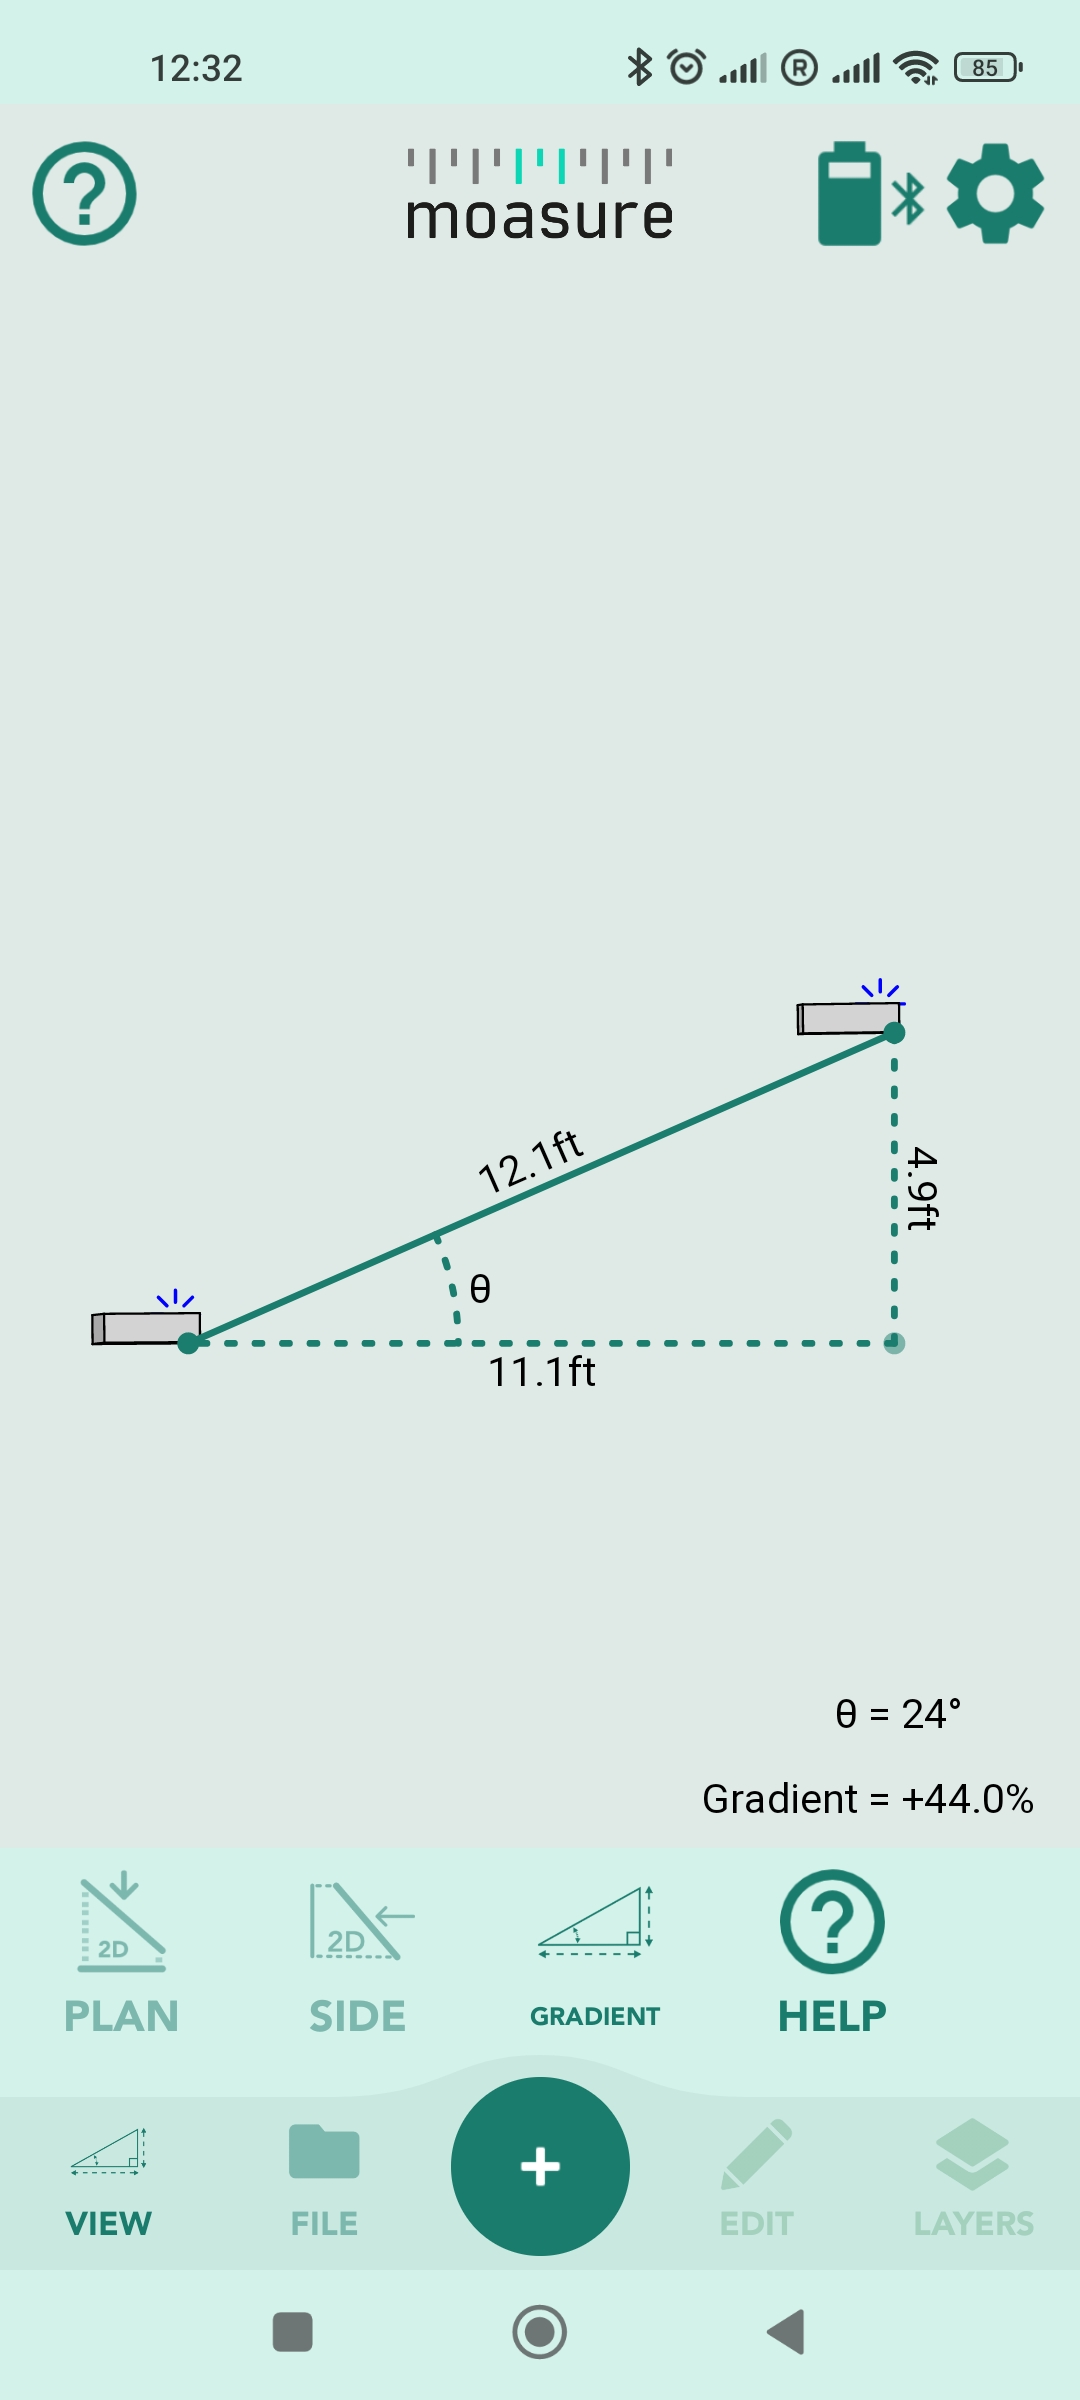
Gradient View
This is only available in a “Point to Point” view and will show you the gradient difference between the start and end points.